Trimming – As received, models will usually have had major gating and vent remnants removed. However there may be some parting line flash, especially on models with particularly sharp "razor" hulls, as it is nearly impossible to achieve a perfect seal and match on two halves of a mold spinning at high RPMs. The best tools for preparation of the models are a flat or convex nail clipper, an x-acto knife and a fine India stone. The nail clipper serves as an excellent shear, capable of clearing remnant flash or gating (A "gate" is the pathway by which the pewter reaches the mold cavity – gating and flash are very different). The India stone helps to straighten and flatten out edges that might have had a parting line removed. Adhesive – The best type of adhesive to use for assembly is Loctite brand Superglue Gel, especially in the "Control" bottle. I previously used Advanced Formula Krazy Glue, but the Superglue seems to work somewhat better. Assembly – My experience is that it's best to mount the model onto the pedestal first, and once that assembly is set, then mount the model's pedestal onto the top of the base. Note that all bases have an indented circle showing where to bond the pedestal. All pedestals have flat bottoms so they can be used on most any base, including sheet metal or plastic bases commonly used in other miniatures rules. |
||
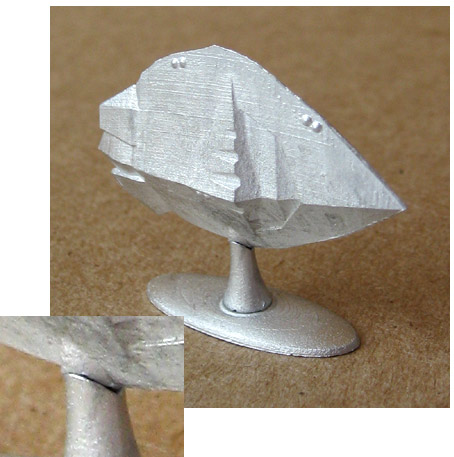
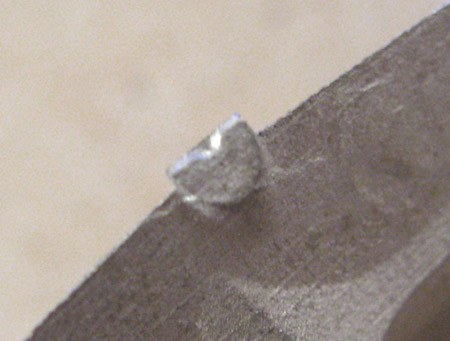
(a) Each model has a drill center indented in its V-Mount face. This center is positioned on a small flat on the tip of the "V" mount, which will facilitate drilling of the model (see Figure 2 at right). (b) We are currently preparing a set of adapters which will convert the V-Mount interface for use on "Pin & Hole" type acrylic/plastic bases. This should allow players to mount these castings on other bases without having to drill directly into the pewter casting. |