INTRODUCTION
These rules
are designed to simulate regimental level combined arms combat during World War
Two using miniature figures for game play. As a player you represent battalion,
regimental or divisional commanders who must maneuver your various infantry,
armor and artillery units against the enemy. You may also be faced with
elements outside of your control such as heavy artillery support, airstrikes
and defensive positions that might show up courtesy of an optional setup system
that allows the possibility of both tantalizing mismatches and dead-even
slugouts. After all, field commanders are rarely able to work out evenly
matched scenarios with their enemies, so be prepared... you never know exactly
what's coming next! Last updated: August 20, 2024.
1.1 Bases & Markers
In order to play 1943, all
infantry, heavy weapons, towed artillery and small vehicles such as motorcycles
need to be mounted on bases made of thin wood, metal or plastic. Vehicles and
tanks at larger scales might not need mounting, although for game play purposes
each vehicle is still referred to as a "base" and larger vehicles might still
be mounted on a base to improve the game's appearance. Basic infantry combat is
conducted with bases, not figures, the number of figures mounted on each base
does not matter for combat results. Below is a chart showing some standard base
sizes which were used to develop the rules, although most basing is generally
optional and does not need to exactly match the sizes shown. It is common to
vary the number of infantry figures mounted on the bases to give each unit a
more varied appearance.
Scale - Each infantry base represents twenty men,
each cavalry base represents ten troopers and each weapon or vehicle base
represents two pieces of equipment, except for the following: Light machine gun
bases and light transport bases such as bren carriers represent three
weapons/vehicles instead of two. Each game turn represents a few minutes of
battle time (averaging roughly two or three minutes). The four different game
scales which are available; large, medium, small and operational allow all
major figure scales to be used for game play. Due to the different scales
offered, all distances discussed in the rules text are referred to in yards.
The combat chart for each scale converts the corresponding movement and weapon
ranges to inches for ease of play.
Base &
Range
Chart |
Large Scale (20mm, 15mm)
1" = 20 yards |
Medium Scale (15mm, 12mm)
1" = 30 yards
|
Small Scale (10mm, 12mm)
1" = 40 yards |
Operational Scale (1/300)
1" = 100 yards
|
| Troop Type |
Base Sizes
(inches)¹ |
Base Sizes
(inches) |
Base Sizes
(inches) |
Base Sizes
(inches) |
| Infantry, Heavy MG |
2 x 1¼ |
1½ x 1 |
1 x ¾ |
¾ x ½ |
| Heavy weapons (Mortar, LMG, AT
Rifle) |
1¼ x 2 |
1 x 1½ |
½ x 1 |
½ x
¾ |
| Towed cannon, Small |
2 x 3 |
1½ x 2½ |
1 x 1½ |
|
| Towed cannon, Med. - Large |
2½ x
3½ |
2 x 2½ |
1½ x 2 |
|
| Small vehicles |
1½ x 3 |
1½ x 2 |
1¼ x 1½ |
|
Medium to large
tanks and
vehicles |
2½ x 4 |
2 x 3 |
1½ x
2½ |
|
| Command base |
3 x 3 |
2 x 2 |
1½ x 2 |
1 square |
| Minefield |
3 x 3 |
2 x 2 |
1½ x
1½ |
1
square |
| |
|
|
|
|
| Weapon Ranges |
|
|
|
|
| Assault Weapons² |
4" |
3" |
2" |
1" |
| A.T. Rifle |
10" |
8" |
5" |
2" |
| Small Arms |
50" |
33" |
25" |
10" |
| MG vs Tank |
20" |
15" |
10" |
4" |
| Mortar (light & medium) |
5" - 90" |
3" - 60" |
2" - 45" |
1" - 18" |
| Heavy Mortar |
|
|
13" - 60" |
|
| Short Artillery³ |
60" |
45" |
30" |
12" |
| Medium Artillery³ |
90" |
60" |
45" |
18" |
| Long Artillery³ |
120" |
80" |
60" |
24" |
¹ — At larger scales, vehicle and tank
miniatures might not have bases, all sizes shown are general recommendations
(optional).
² — Assault weapons include flamethrowers and
submachine guns.
³ — Direct fire artillery only. Barrages have no
range limit. |
Game Markers - Game markers are used to track the
status of combat units or bases, and may consist of miniatures mounted on
single bases, colored wooden cubes or cardboard chits. There are also numerous
wargame accessory manufacturers who make great looking plastic tokens of all
types that work excellently as 1943 game markers. The following list outlines
some of the more common markers that make game play more convenient:
- Demoralized: Black marker cube or single
casualty figure on a base.
- Prone: Green marker block, single prone
figure on a base or plastic token like a Litko Mecha "Prone" marker.
- Pinned: Yellow marker cube.
- Immobilized (Temporary): Tread segment or
wheel on a base, or a chit or clear plastic token with Immobilized marked on
it.
- Immobilized (Permanent): Tread segment or
wheel on a base, or a chit or grey plastic token with Immobilized marked on
it.
- Abandoned: Figure of dismounted crewman on
a base or a chit or clear plastic token with Abandoned marked on it.
- Damaged: Small smoke column marker.
- Pass fired: White marker block or single
firing figure.
- Destroyed Vehicle: Large smoke column
marker (and remove tank turret).
- "No HE" tag: Red marker cube marked with
"NO HE" to mark weapons/vehicles no longer able to fire anti-personnel
ammunition.
- "No CP" tag: Red marker cube marked with
"NO CP" to mark weapons/vehicles no longer able to fire capped (APCP)
ammunition.
- "No AP" tag: Red marker cube marked with
"NO AP" to mark weapons/vehicles no longer able to fire armor piercing (AP)
ammunition.
- "No Ammo" tag: Red marker cube to mark
weapons/vehicles out of ammo.
- Artillery Barrage: Red glass "stones" used
for role playing games are excellent. A plastic explosion token also works
well.
- Airstrike: Airstrikes tend to occupy square
spaces, so using the leading edge of an aircraft model base (with plane), or
other square marker base that identifies it as an airstrike, and if necessary
what type of airstrike (dive bomb, rocket, etc.).
- Minefield: See Bases & Ranges table
above, minefield are shown using 60 yard square bases.
- Smokescreen: White "cloud" marker made of
felt, plastic or wood.
- Hull Down: A chit or plastic token like a
Litko Mecha "Hull Down" marker.
- Dust Cloud: Using tan felt or plastic "Dust
Cloud" markers both work. This references the dust cloud thrown up by moving
tanks, etc.
« 1.2 Terrain
One of the
most common terrain systems in miniature wargaming uses flocked stryofoam that
is cut into shapes to create sloped hills. Another common and increasingly
popular terrain system uses gaming mats made of mouse pad rubber which portray
realistic looking ground surfaces. The latter can be cut into hill shaped
sections like map contour lines and stacked to create shallow rises and dips.
For game play, each hill section is considered to be one level high. Units
within 40 yards of a "hill's" edge (the meeting line between the slope and flat
hill-top) may spot and be spotted by those on lower levels, otherwise they are
considered to be too far away from the edge of the plateau to establish line of
sight. Treating gaming hills as the plateaus they resemble is usually the best
way interpret these features. This also creates dead ground along the bases of
most hills or shallow rises, which is another realistic effect.
To
create roadways and trenchlines, use varying widths of gaffers tape to show
main and secondary roads (roads and entrenchments may be tan or brown). Rubber
gaming mats of forest, grass and related textures can also be cut into outlines
or "footprints" for placement of trees and buildings. Lichen can be used to
create hedges or areas of brush.
Each segment of game-board buildings
actually represents the outline of a block of buildings. Troops inside these
areas are not actually inside a single building, they are actually in a built
up area which include everything from fence-lines, plots of land and farms to
business blocks, cemeteries and government buildings. Make sure to consult the
terrain chart below for general guidance on the game-specific characteristics
of various terrain types. Players are encouraged to use this as a basis for
creating their own interpretation of basic battlefield features.
| General Terrain Effects |
| Action/Terrain Feature |
Movement Effects |
Height |
Blocks LOS? |
Cover type |
Penalty
Type |
May assault
through? |
Impassable to: |
Prone |
Stand |
Weight |
Open? |
| Wood buildings |
Rough |
Yes |
- |
½ level |
Yes |
Yes |
Soft |
No |
| Brick
buildings |
Rough |
Yes |
- |
½ level |
Yes |
Yes |
Solid |
No |
| Concrete buildings |
Rough |
Yes |
- |
1 level |
Yes |
Yes |
Hard |
No |
| Fire
Trench |
Fire
trench |
No |
Half-track, Horse, Wheel |
0 |
No¹ |
No |
Hard |
No |
| Slit Trench |
Slit trench |
Yes |
Half-track, Wheel |
0 |
No¹ |
No |
Solid |
No |
| Foxholes |
- |
Yes |
- |
0 |
No¹ |
No |
Hard |
No |
| Hasty Dig-in |
- |
Yes |
- |
0 |
No |
No |
Solid |
No |
| Light
Woods |
Light
woods |
Yes |
- |
1
level |
Yes |
Yes |
Soft |
No |
| Heavy Woods |
Heavy woods |
No |
Wheeled |
1 level |
Yes |
Yes |
Solid |
No |
| Heavy
Brush |
Brush |
No |
Wheeled |
0 |
Yes |
No |
Soft/Solid² |
No |
| Rubble, Rock Field |
Craters |
No |
- |
0 |
No |
No |
- |
Yes |
| Stone
wall |
Stonewall |
Yes |
Wheeled, Horse |
0 |
Yes |
No |
Solid |
Yes |
| Hedgerow |
Hedgerow |
No |
Wheeled, Horse |
½ level |
Yes |
Yes |
Soft |
Yes |
| Stream bank |
|
No |
Wheeled |
0 |
No |
No |
Solid |
Yes |
| Soft ground, Mud, Snow,
Sand |
Rough |
No |
- |
0 |
No |
No |
- |
- |
| Marsh |
Heavy
woods |
No |
Wheeled |
0 |
No |
No |
- |
- |
| Shallow ford |
Shallow ford |
No |
- |
0 |
No |
No |
- |
- |
| Deep
ford (river, lagoon) |
Craters |
No |
Wheeled, Half-track |
0 |
No |
No |
- |
- |
| Cratered areas |
Craters |
Yes |
- |
0 |
No |
No |
Solid/Hard³ |
No |
| Wire
entanglements - Heavy fence |
Hvy
entanglement |
No |
Wheeled, Horse, Tracked |
0 |
Yes |
No |
- |
- |
| Wire entanglements -
Medium coil |
Med entanglement |
Yes |
Wheeled, Horse |
0 |
No |
No |
- |
- |
| Upslope |
Upslope |
Yes |
- |
0 |
No |
No |
- |
- |
Terrain Table
Notes:
Buildings — Represent blocks of structures and related
walls, outbuildings and urban obstacles. Accessible to all due to presumed
presence of streets and alleys throughout.
¹ — Bases which are
prone within trenches or foxholes are invisible to other bases and may not
fire, nor be fired upon by direct fire weapons (they may still be attacked by
area weapons).
² — Bases which are prone anywhere within a
scrub/brush area may still fire and be fired upon, with both parties suffering
the appropriate terrain modifier for solid cover (-2) as well as all other
applicable modifiers. Bases which are standing within a brush/scrub area are
considered to be in soft cover.
³ — Cratered areas are a hybrid
cover class. They only offer cover to units which have gone prone while within
the cratered zone. Otherwise, these zones are considered to be open terrain.
Upon going prone in a cratered zone, the player controlling the unit must
declare whether it is "engaging" or "hiding." If engaging, the unit may fire
its weapons and receives a solid cover bonus. If hiding, the unit may not fire
weapons, but it receives a hard cover bonus. Units which have gone prone in a
cratered zone have the over the top modifier applied to their command
rolls.
Chart Key:
Terrain Feature = Gives name of the
terrain feature in question. Movement : Penalty Type = States
which terrain types listed in the combat chart most closely match.
Movement : Assault Through = Indicates whether a unit may move through
that terrain type using its bonus assault movement. Movement :
Impassable = States which troop types may not pass through that terrain
type. Height = Indicates which height class the terrain feature fits
into. Block LOS? : Prone = Indicates whether that terrain type will
block the line of sight of prone infantry. Block LOS? : Stand = Indicates
whether that terrain type will block the line of sight of standing (upright)
infantry. Cover Type : Weight = States the nature of cover (Soft, Solid
or Hard) offered by the terrain type. Cover Type : Open? = States
whether the terrain cover type is open. Open cover only gives protection when
it lies between a direct fire weapon and its target (i.e., the protected base
still resides on a patch of open ground). Open cover never protects against
mortar fire, area weapons or air attacks. Unless stated as open, a cover type
is considered to be full cover, which cover and surrounds a base while giving
protection and cover. |
Wire Entanglements - There are two types of wire
entanglements: Heavy fence and Medium coil. Heavy fence blocks the movement of
all but foot troops, who can only move at one-quarter speed across the
entanglement (a half-inch wide heavy entanglement base costs two inches of
movement to cross). Medium coil is not as heavy or secure to the ground, and
can be crossed by foot troops and fully tracked vehicles (tanks). The passage
of a tank base across a line of wire entanglement will destroy one wire segment
at the point of passage (wire should be used in segments roughly equal to a
tank width). There is a risk of tanks become temporarily immobilized when
crossing medium entanglements, see the movement modifiers on the combat chart's
Move table. Each barrage roll of a natural 6 will, in addition to
other damaged inflicted, destroy one segment of wire if any are present within
the barrage zone.
«
1.3 Unit Types
There are three types of combat units
available to the player; personnel, tank and aircraft. The distinctions are
important to game play and should be remembered. Long range heavy artillery
support from off-board is handled abstractly and does not require the building
of units.
- Personnel Units - These units are numerous but
fragile. They are most susceptible to small arms fire and high explosives
(Anti-personnel fire).
- Infantry - The bulk of any army is the
infantry. Rifle and grenade armed troops directly supported by light machine
guns, light mortars, anti-tank rifles, bazooka's and sometimes even
flamethrowers.
- Heavy weapons - These extra fire-support
bases allow the flexible concentration of additional firepower. Heavy, medium
and light machine guns, light and medium mortars, anti-tank rifles and
flamethrowers are the most common types.
- Assault Weapons - These lethal, short-range
heavy weapons are used in three different ways: 1) As dedicated infantry
sub-units. 2) As attachments to sub-units. 3) As individual heavy weapon bases.
In all cases they have the special ability to fire on the move while
participating in an assault. Assault capable weapons are: Light machine guns,
flamethrowers, submachine guns and (rarely) assault rifles. Assault weapon
range is 80 yards.
- Field Artillery - Usually some kind of
towed cannon or mortar for use as direct infantry support, direct anti-tank
missions or some combination of the two. May also include heavy mortars and
towed rocket launchers.
- Cavalry - By 1939 cavalry was mostly
relegated to scouting and partisan use but nevertheless remained on the field.
- Transports - Lightly built vehicles such as
trucks, jeeps, wagons and horse teams, they were used for moving infantry and
heavy weapons. They had little or no protection and were not voluntarily
exposed to direct enemy fire. These may include "portee" vehicles which are
trucks with small cannon bolted to the open bed.
- Tank Units - Tanks and their relations are
heavyweight units which combine various levels of mobility, firepower and
protection. Their most common shared feature is armor or other protection which
shields against shrapnel, small arms fire, and other battlefield hazards. They
are most vulnerable to direct fire armor piercing rounds and shaped charges
(anti-tank fire), and are least vulnerable to small arms fire, high explosives
and indirect barrages.
- Tanks - Tracked vehicles with their main
weapon(s) mounted in a revolving turret. Their primary role is to destroy other
tanks and help maintain the tempo of an advance.
- Tank destroyers - A tank chassis with its
main weapon mounted in the hull or a light turret. It is designed to standoff
and ambush more valuable tanks while not exposing itself.
- Self-propelled artillery - Tank chassis
with a shielded cannon mounted on top of the hull. Mostly used for
antipersonnel fire, some are called "assault guns" and use dual purpose cannon
for both anti-tank and antipersonnel fire.
- Armored cars - Fast, lightly protected and
armed, these wheeled vehicles are used mostly for reconnaissance.
- Half-tracks - Tracked "battle taxis" used
to carry infantry and their support weapons into combat areas while giving them
some protection against antipersonnel fire. Half-tracks move on roads as if
they are tracked, but they are affected by other terrain as if they are
wheeled.
- Emplacements - Pillboxes and bunkers were
heavy structures used to protect infantry and heavy weapons. They were usually
made of concrete or logs re-enforced by earth.
- Aircraft - The ultimate expression of speed and
firepower (in 1943). An air attack could not occupy ground, but when properly
executed it could paralyze and terrify the enemy. During game play, the margin
by which a player wins control of the air over the battlefield may affect the
number of air attacks available for close ground support. No anti-aircraft is
dealt with during the game, its resolution is folded into the air superiority
and support die rolls. However, the presence of aircraft on the board (or more
precisely, the use of airstrikes within a turn) may distract ground based AA
guns away from conducting fire on ground targets. For more information see
Command Control and Direct Fire Special Rules.
«1.4 Game Units and
Formations
Bases and Units - The bottom two levels of
organization used for game play are bases and units (also called
subunits). Each infantry base is composed of several figures and each
unit is composed of several bases. These two non-historical components, bases
and units, are used to create the other historical formations used in the game.
Personnel subunits always number either one, three, six or nine bases
each. Each of these units may conduct a single attack roll on the Small Arms
Fire Chart each turn. Hence, formations with their strength divided into
smaller subunits will have greater functional firepower, and formations
composed of fewer, larger units represent less effective firepower.
Like infantry formations, all-vehicle formations are composed of subunits.
Unlike infantry formations, these vehicle units are always composed of three
bases, each of which may move and fire independently of each other (vehicle
bases also fire individually, not as units like infantry). Vehicle units must
follow the same command and morale procedures as infantry units.
Formations - There are two types of formations used
for game play; combat formations and command formations. Combat
formations are composed of subunits, and command formations are composed of
groups of combat formations. The most common combat formation is the battalion,
which is usually composed of several units. The most common command formation
is the regiment, which is usually composed of several battalions. Either
formation type may also have additional support bases attached to them (see
below). The Infantry Units and Formations and Armored Units and
Formations pages include selections of various historical formations
accompanied by the numbers and types of bases, units, formations and support
base types to be used for game play. Players are encouraged to conduct their
own research in order to create their own favorite units along the lines of
those shown.
Support Bases - Some units or formations may have
extra heavy weapon or transport bases attached to them. Most common are heavy
weapon bases, which can each conduct one fire attack roll per turn (some
transport bases do not have weapons and therefore may not fire). Heavy weapon
bases may operate anywhere within their parent formation's deployment zone as
dedicated detached bases or, if they are machine guns, anti-tank rifles
or flamethrowers, they may be attached directly to any base within any
sub-unit belonging to the formation (label the bottom of host infantry bases to
track the presence of attached support bases). The advantage of detached
operation is the ability to initiate assaults or maneuver to flanking
positions. The advantage of attaching is the relative cover offered by mingling
with the infantry. Attached weapons may still fire independently of the host
infantry bases.
Transport bases must always operate as dedicated
(detached) bases and will rarely have any fire capability. Transport bases are
allowed to standby by seeking cover anywhere within the combat zone,
even if doing so exceeds the allowable base interval for that unit or
formation. Transports which assume a standby position are not considered
stranded, but before moving they must roll successfully on the command chart
with the Withdrawn modifier and any other applicable modifiers.
Command Bases - Every bottom level command formation
must begin the game with a command base which abstractly represents its command
infrastructure. A bottom level command formation is the first formation of any
chain-of-command which is composed of combat formations instead of subunits
(this will usually be a regiment). Command bases cannot be attacked by direct
ground fire or assault and they may not be used for friendly spotting or attack
purposes. Command bases may be attacked and damaged – but not destroyed
– by enemy barrages and air attacks. The attackers must score an
unmodified D or K result on the Area Weapons Chart
in order to damage a command marker. Each K hit inflicts one full
damage point to the command base, each D hit inflicts one-half of
a damage point to the command base. Due to their special nature, command bases
do not benefit from being entrenched or otherwise protected, although there is
no limit to how many times they may be damaged. Each damage point scored
against a command base will lower the command die rolls of all subordinate
units by one point.
The most common bottom level command formation is
the regiment, usually composed of several battalions accompanied by support
bases. In some armies of this period the bottom level formation is the brigade
(i.e. - Great Britain and Commonwealth) which is why the rules do not simply
refer to all bottom level command formations as regiments. Also, there were
many specialized assault formations which enjoyed unorthodox command structures
that were clearly separated from those formations around them. Only bottom
level command formations are required to have command bases. Formations above
this level are assumed to be large enough to maintain communications within
their fronts.
| Max Base Interval |
Personnel
(according to
training) |
Tanks
(according to national
rating*) |
| Poor or worse |
Average |
Great or better |
Poor |
Good |
| 80 yds |
120 yds |
240 yds |
Line of sight |
No limit |
|
*Based on communications
gear generally installed (or not installed) in that nation's tanks.
Poor = Soviet Union, France 1940, Poland, Italy, Japan
Good =
Germany, United States, United Kingdom. |
Intervals and Deployment - All member bases of each
unit must remain within a certain range of each other during game play. This
range is known as the base interval. The maximum allowable base interval
is limited by the unit's training level as shown in the Base Intervals chart at
right. The entire area occupied by and immediately surrounding all of a
formation's component units is referred to as the deployment area. This
includes areas between bases as well as a border zone surrounding the formation
equivalent to the allowable base interval.
Example: An average trained unit at medium scale
may separate its individual bases by as much as four inches from base edge to
base edge. A machine gun attached at regimental level may move anywhere within
this area, but it must remain within four inches of at least one supported base
belonging to a unit from the same regiment.
There is no
minimum allowable base interval. Component bases of a unit may operate as close
(packed) together as the controlling player wishes. Support bases may not be
used to "bridge" or otherwise lengthen the intervals between unit bases.
Individual bases which find themselves separated from the rest of their parent
unit (usually due to casualties) are considered stranded. Stranded bases remain
stationary until bases from their unit or formation re-establish contact by
moving within the proper base interval. If a large unit is split roughly in
half in this manner, the larger half will become "in command" and the smaller
half is considered stranded.
Support Range - All friendly units
offer a general support to each other by their mere proximity. This is referred
to as support range, which becomes an issue at several different points
in the game, especially regarding setup and morale. Support range for all units
is 240 yards.
Occupying Fortified Positions - Units may exceed the
allowed base interval if they are trying to fully occupy fortified positions
that include trenches, bunkers, pillboxes and machine gun nests that are
dispersed over a broad front. The unit bases must still remain in a generally
contiguous deployment and may not be mixed with bases of other units.
«
1.5 Troop Quality
Every unit in game play is
assigned a morale level and a training level. These levels affect virtually
every aspect of unit performance, and have a profound effect on the outcome of
a battle. Below is an outline of these troop grades, and a short description of
the conditions for each.
Morale Grades
- Fanatic: These thoroughly indoctrinated men
will obey virtually any order and can suffer the most appalling casualties
while remaining operational. They are usually rather overconfident and hence
have poor reconnaissance and perimeter security practices. These later habits
set them up for major disappointments if defeat actually does come, and so
fanatic units tend to disintegrate far more dramatically than other more stable
troop types.
- Reckless: Usually highly trained
specialists who are supremely confident in their abilities, these men are truly
dangerous and they know it. They will take apparently suicidal risks in the
daily pursuit of their job and come back ready for more the next day. Some
reckless troops lack professional training, and draw on religious or ethnic
grievances to fuel their actions. The later type tend to have extremely low
training levels.
- Brave: Good, old-fashioned crack troops,
firmly indoctrinated in the traditions of their particular service. Brave
troops are more numerous than reckless troops, and do not have the same
disregard for personal safety. But you had better pay them the respect they
deserve, otherwise they will be eating dinner in your dugout tomorrow
evening.
- Steady: The result of most armies of the
world, average, steady troopers are capable of dishing out plenty of punishment
and absorbing a lot in return. They will however, eventually give way if put in
too difficult of a situation.
- Unsteady: The weakness of their officers
makes these men nervous, because they aren't sure what's going to happen. They
may be fighting an enemy they would rather not fight. They also may be new,
poorly trained troops who know their immediate higher-ups are just as green and
vulnerable as they are, compounding an already nervous and panicky
situation.
- Mutinous: A breakdown in confidence has
occurred between commanders and their men. The men believe that their lives
will be (and probably have been) wasted in futile engagements. A famous
real-life example would be the many Italians who surrendered in the African
desert rather than watch their aristocratic officers dine comfortably while the
enlisted men starved.
Training Grades
- Outstanding: Mere extensive drill and
practice is not enough for these guys. They are usually practitioners of the
latest tactical theories, and have an intricate familiarity with all weapons
needed for the task at hand. Aggressive, strong and smart, their actions are
almost always well coordinated with those of other supporting units, including
artillery and other nearby specialists.
- Great: The best training available for
large formations. Great training comes with time and a generous commitment of
equipment and resources for the task. Formations with great training have a
much better chance of springing back from adversity than other less fortunate
units.
- Average: Again, the world norm for drill
and equipment usage. Average troops will usually have a good idea what to do
next, and they will always have the basic tools to do the job, coupled with the
knowledge needed to use those tools.
- Marginal: These guys are trying to do the
right thing, but their own government is conspiring to prevent them from doing
it. They probably do not have enough equipment to train with, and maybe even
not enough to fully outfit their units. There also may be other factors, such
as a multinational force which suffers from major language or class barriers
and which constantly interferes despite the best marginal efforts of everybody
involved.
- Poor: A truly unfortunately situation.
Poorly trained troops have been thrown into a situation about which they
probably know nothing. They are usually illiterate, under-equipped and poorly
supplied. Their own government barely manages to arrange for them to be fed and
clothed, and their officers are too few and too unprepared to cover the tasks
at hand. In fact, the poor training of their officers may even be the main
reason entire units are sunk to such a low level.
| Turn Sequence |
- 1) Air
- - Roll for airstrike activation,
place airstrikes if they arrive.
- - Roll for new air support
requests.
- - Roll for random aviation
presence.
- - Resolve all deployed
airstrikes.
- 2) X Roll
- - High roller moves or
fires.
- 3) Y Roll
- - High roller moves or
fires.
- 4) Z Roll
- - High roller moves or
fires.
- 5) F Action
- - Conduct final unexecuted move or
fire phase.
- 6) Casualty morale
test
- 7) Assaults
- - assault resolution
- - rout morale test
- 8) Fire Support
- - Resolve all active barrages (on
board), remove barrage markers.
- - Roll for open fire support
requests, place new markers (if any).
- - Roll for new requests (if
able).
- - Place arriving artillery
barrages
|
« 1.6 Game
Setup
To begin a game, use the Setup Page to help layout the background of the battle,
including features like air superiority, air strikes, artillery fire support,
defenses and other useful features. Experienced players can also create their
own game scenarios or use their own set up system. All personnel class units
may begin a game in a hasty dig-in position and/or prone. Vehicle units may
start the game as moving. Once the game begins, the sequence of play is
followed until a Lull occurs or players stop the game.
« 1.7 Turn Sequence
During the course of
each turn, the two sides will have a chance to move their units and conduct
both small arms and direct artillery fire. Players might also have extra
resources to employ such as barrages, depending on set-up sheet use and
results. Once players have finished the last step of the full turn sequence,
the game continues by repeating the turn sequence process until one side is
wiped out or pulls off the battlefield, or if both sides agree to halt the
game. The first phase of the turn sequence starts with both sides reviewing and
acting on their aviation options:
1) Air - Both sides place
airstrike markers from activated open requests (if any airstrikes became
available). Then both sides make new requests (if able) and set-up resulting
requested airstrike marker with its count die (the Request Stack). Then
the air superiority player rolls 2D6 for random aviation presence. An 11 result
means some sort off aircraft overflight without an airstrike action has
occurred (acts as distraction for ground AA units). A 12 result means the
player gains a surprise general airstrike. Immediately resolve all airstrikes -
both requested and surprise.
2) X Roll - Each side rolls 2D6. The
high roller is the winner (ties roll again) and decides whether to move their
units or conduct all direct fire for their units. If they choose to fire,
resolve all fire combat and hits immediately. Unless troop reaction is
involved, only the winning player may fire. Movement is voluntary, the player
may choose to do neither action, specifically declaring that he is not doing
anything (this matters) or they may leave their options open to possibly move
or fire later in the turn and pass the initiative over to the other side,
letting them move or fire.
3) Y Roll - Each side again rolls 2D6. The
high roller is the winner (ties roll again) and decides whether to move their
units or conduct all direct fire for their units. The limiting factor in the
Y-Roll is that the player action from the X-Roll may not be repeated. So if
"Army A" won the X-Roll and moved, and then wins the Y-Roll, they must fire on
this phase or declare not to fire, or pass the initiative off to the other
player in the hope that they can fire before the end of the turn (this latter
choice is very unlikely to happen, players typically fire before the enemy
whenever they have the chance).
4) Z Roll - Repeat the above steps,
with the two actions previously conducted not able to be repeated.
5) F
Action - At this point, the two sides will have conducted three phases
worth of actions. The one action (move or fire) by the one player who has not
conducted it yet, can now be executed. Note that if either player declines both
movement and firing, it triggers a Short Lull as of the end of the
turn.
6) Casualty Morale Tests - Both sides conduct all necessary
morale tests per the morale rules.
7) Assault Resolution - Both sides
mutually resolve pending assaults and conduct any resulting morale tests on
units that routed.
8) Barrages - Begin by resolving all active
barrages (barrage markers that were placed on the board last turn, and which
have been setting there). This involves rolling on the Area Weapons table for
barrage effects against the units that are within the barrage radius, resulting
hits are immediate. Once completed, remove all old barrage markers. Both
players may then roll to find out if open fire support request stacks from last
turn (if any) arrive. If they arrive, the corresponding quantity of barrage
markers may be placed on the board. If they do not arrive, the request stack is
left until next turn when the player may try again to activate the stack
(activate meaning "get the barrage to arrive now!"). Both players may then roll
to set-up more open requests (if able) based on their fire support
availability. Note that unlike planned artillery, which is a consumable
pre-game feature, the fire support pool is not consumable. Once the fire
support points assigned to a stack have been placed on the board as barrages
and then resolved, those fire support points are available to be requested
again. The fire support pool is a resource that remains available throughout
the game unless reduced in size by counterbattery fire.
Turn Sequence
Notes - Troops with certain troop reaction profiles may be able to act
during phases outside of the normal sequence of actions. See the corresponding
section of the Set-up Page.
« AIRSTRIKES
In order to use
airstrikes, players should have rolled for Air Superiority and Air
Presence while setting up the game using the Setup Guide. The air presence value, which the player can
record on his Play Sheet, is then used as a
pool to draw from in the form of airstrike requests. These requests can become
available later, and more requests can also be made (air presence permitting).
This cycle repeats itself at the beginning of each turn. Using airstrikes
in the game is entirely optional, players who want to just run a quick
tank or infantry fight can bypass this section and the related parts of the
setup guide and go directly to the Movement
rules.
Activation Roll & Airstrike Placement- For the first
step in this phase, each side rolls the activation die that is setting on their
airstrike marker. Most airstrike markers will be plane models on plastic bases,
the activation die can usually be set on the base and both of them placed
temporarily out of the way. If the player has more than one airstrike in their
request queue, the bases will be lined up and the activation die placed on one
of them (the next step in this phase will explain where the activation die
comes from). The number showing on the activation die represents the top of the
number range needed to roll on 1D6 to activate that airstrike for this phase.
For example, if the activation number is a 4, then the requested airstrike
arrives over the battlefield and conducts its airstrike this phase if the
controlling player rolls a 1 through 4 on 1D6. It is best to leave the
activation die setting on the airstrike marker, to keep track of the activation
number. Roll another die to find out if the airstrike is "activated" and the
planes have arrived over the battlefield.
| A I R S T R I K E T Y P
E S |
| Type |
Description |
| Strafing |
Strike Zone: 1" x
6" rectangle. No area weapon modifier. |
| Level Bombing |
Strike Zone: 2" x
6" rectangle. No area weapon modifier. |
| Dive Bombing |
Strike Zone: 2"
square. +1 area weapon modifier. |
| Rocket |
Strike Zone: 2" x
3" rectangle. +2 area weapon modifier. |
| AT Cannon |
Strike Zone: 1" x
5" rectangle. +2 area weapon modifier against tanks. |
| |
Strike zones
project from the leading (front) edge of the airstrike marker base, with the
shortest wall of the rectangle anchored on the center of the leading edge and
the length of the rectangle projecting forward. |
If the player misses the roll by rolling a number
outside the activation range, the requested airstrike(s) remains uncommitted
and queued until the next turn's attempt at another activation. Missing the
activation roll basically means that the planes are running late and have not
arrived in the air over the battlefield yet. Once set-up, the airstrike request
queue cannot be cancelled except as a result of a long combat lull.
If
the player successfully rolls equal to or less than the activation number, the
airstrike base (or bases) is placed on the game board, at a location of the
owning player's choosing. There are five types of airstrikes as outlined in the
Setup Guide: Strafing, Level bombing, Dive bombing, Rocket and AT Cannon. See
the Setup Guide for more
about which airstrike types can be used in a game. At right is a table showing
airstrike types and the sizes of their strike zones.
New
Airstrike Request - After resolving the airstrike activation and placement
step, each side may then make new requests if there are any remaining points in
their respective air presence boxes. Roll 2D6, one black and one white. The
black die result is the maximum number of airstrikes that can be pulled from
the air presence points (one air presence point equals one airstrike). The
white die result sets the activation number for this airstrike (or group of
airstrikes). Set a small die on the airstrike base with the activation number
turned-up. This is how you found the airstrike and activation die waiting for
you at the start of the turn - they were placed there last turn (or before game
play started).
The player does not have to use the full quantity of
points rolled on the black die. The black die result is merely the maximum
number of airstrikes the player can pull this turn to go into this group (air
presence points permitting). The current air presence point total is a strictly
finite set that cannot be exceeded. If there are only three air presence points
remaining, then only the first three points rolled on the black die mean
anything.
Example #1: A player with two air presence points
rolls a 1 on the black die. The player may only pull one airstrike marker and
roll the activation number for it. He should also reduce his air presence
number from a two to a one.
Example #2: A player with five air presence
points rolls a 3 on the black die. He may place one, two or three airstrike
markers off to one side of the table as this turn's request group and rolls one
activation die for the group, placing the small die showing the activation
number on one of the airstrike bases. Keep them together as a group, where they
will set until next turn when the player will roll for that airstrike group's
activation (and resulting arrival). The player will also reduce his air
presence value from five down to two (presuming he used all three available
points).
Random Aviation - The air superiority player
rolls 2D6 for random aviation presence (in case of an air superiority tie,
either player rolls, but somebody rolls). An 11 result means some sort of
aircraft overflight occurs, without an airstrike action happening. A 12 result
means the player gains a surprise strafing airstrike (in case of an air
superiority tie, roll dice to see who gets the surprise, high roller wins).
Place the new airstrike on the board according to the same rules
above.
Resolve Airstrikes - Immediately resolve all airstrikes
currently deployed on the field using the Area Weapons table on the combat
chart, checking for hits on bases within the strike zones as outlined in the
Activation Roll section. Refer to the Area Weapons section under Artillery
Barrages for more about using the table and its modifiers.
Distracted
AA - The last thing to do is mark light AA bases present on the battlefield
(those with an AP/HE value of three of less) as being distracted due to
any air presence over the field by placing a Hold Fire marker next to
them. They are paying attention to the local air action and may not engage
ground targets for the entire turn (they may still move). This is done if any
aviation for either side was present during the phase, including airstrikes and
overflights. If no aviation from either side was present, the AA bases are not
distracted.
« MOVEMENT
The movement rules
cover both movement and command, plus numerous movement related actions such as
transport, digging of local defenses and terrain effects. Movement itself is
conducted on a roll-to-move basis; each player rolls 1D6 to see if their unit
will move this turn, with modifiers added to account for important factors.
3.1 Command Control
Each turn that a unit
wishes to move, it must first pass a command test using one six-sided die
(1D6). Only if it passes the test may the unit move. If it fails the roll, it
must remain stationary at its current position. To test a unit, roll the die
and modify the result using the command chart modifiers (see definitions below)
located in the combat chart's Command box. Cross index the unit's
training value with the appropriate Maneuver or Assault/AA Engage
columns on the chart. The modified die roll value must be equivalent to or
greater than the value shown. The Maneuver column is used if the unit
attempts to move or change its disposition in any way, including standing from
prone. Going prone requires no die roll. The Assault/AA Engage column is
used for any unit which attempts to assault move or move into assault contact
with an enemy unit or; for an AA base that is attempting to fire on ground
targets (instead of watching for enemy aircraft as listed in their job
description). Units may use their extra assault movement even if they will not
contact an enemy unit. They must however, still use the Assault side of the
command chart. Players must declare whether a unit will attempt to maneuver or
assault before making the command test die roll.
Contacting the
enemy - Units which attempt to assault enemy troops must move all of their
component bases forward in an attempt to establish base to base contact with
enemy bases. Units may maintain their initial base interval while advancing to
contact, or they may compress/expand their frontage as terrain allows.
Assaulting units are never obliged to pack their formation into a close order
unit in the process of moving to contact, although failure to do so may
sometimes result in assault contact with more than one enemy unit.
Command Chart Modifiers
- Each consecutive maneuver move: Add one
point to the command die roll for each consecutive maneuver move which that
unit has previously conducted. This modifier helps to emphasize that once a
unit starts moving, it is easier to keep it moving.
- Flexible command: Add one point to the
command die roll if the unit nationality and type's (infantry or tank) command
rating is Flexible (flexible command doctrine gives local commanders broad
discretion in handling unexpected conditions).
- Rigid command: Subtract one point from the
command die roll if the unit nationality and type's (infantry or tank) command
rating is Rigid (rigid command doctrine - if any doctrine exists at all -
discourages local commanders from showing initiative. Unexpected conditions or
sightings of any type, even imaginary, can bring units to a halt).
- Over the top: Subtract one point from the
command die roll if the unit is within small arms range of enemy troops and
attempting to move into the open by exiting solid or hard cover, or emerging
from prone.
- Each command (HQ) hit: Subtract one point
from the command die roll for each damage point presently on that unit's
regimental command base.
- Each consecutive assault move: Subtract one
point from the command die roll for each consecutive assault move or assault
move attempt which that unit has previously conducted. Note that units do not
need to contact an enemy in order to conduct an assault move.
- Pinned or withdrawn: Subtract two points
from the command die roll if the unit withdrew during the previous turn and/or
is currently pinned down.
- Demoralized: Subtract four points from the
command die roll if the unit is in a demoralized state.
« 3.2 Infantry and Cavalry
Movement
Infantry and cavalry movement allowances are indicated on
the Movement portion of the combat chart, and are subject to the modifiers
shown. Each allowance indicates the total distance which each unit may move
during the course of one turn. Infantry and cavalry bases may move forward,
sideways or backwards as part of their normal movement rate. They may not move
sideways or backwards into assault contact with enemy bases (e.g. - units may
only initiate assault contact using the front edges of their component bases).
Definitions of the infantry movement categories are as follows:
Prone - Troops are laying down and using local
terrain to create extra cover. A unit may go prone or stand once during
each of its own movement phases; meaning that a unit may not stand from prone,
move and then go prone again. Prone units may assault move (and move into
assault contact) while remaining prone. Prone engineers may clear minefields
while remaining prone, but no prone units may dig field entrenchments
(foxholes, hasty dig-in, etc.) while prone. Mortars and heavy machine guns may
not move or fire while prone.
Manhandling - Any towed cannon or
mortar being moved without the aid of motorized transport.
Walking -
Normal movement rate for infantry. Troops are considered to be moving upright,
at a brisk pace.
Rushing - Troops are considered to be alternating
between prone, and bursts of running, usually in a leapfrog pattern with some
portions of the unit supplying covering fire. Units may not use rushing
movement to establish assault contact with an enemy unit.
Heavy
Weapon - Maximum movement rate for heavy weapon bases such as machine guns
and light mortars.
Cyclist - Rate of movement for bicycle mounted
troops. Note that cyclists are considered wheeled troops, and so their cross
country performance is poor compared to their road performance, which is the
mode for which they were designed.
Wagon/Limber - Even though
they are horse powered, wagons and limbers count as wheeled transport, and are
subject to wheeled transportation movement modifiers. Like cyclists, their best
mode of travel is by road.
Cavalry Functions - Cavalry units may not use
assault movement if they will enter woods, water obstacles, or buildings during
the turn. They may mount/dismount their horses at a cost of 1/4 of their move
on any turn in which they have not conducted assault movement. Dismounted
status is indicated by adding separate dismounted troop bases to the game board
adjacent to the horse bases. One base should be withdrawn to function as "horse
holder." The original cavalry bases are then employed as markers to show the
location of the horse herd while the cavalry troopers are dismounted. While
herded together, dismounted cavalry's horse bases count as packed targets.
Dismounted cavalry trooper bases operate in all respects as infantry.
If horse herd bases are lost while their cavalry unit is dismounted,
the dismounted bases may continue to operate on foot, but may not remount
unless a corresponding number of dismounted bases are lost. (I.E. - Remounting
bases must match the number of horse herd bases). Cavalry units may not abandon
dismounted bases which do not have remounts available, although such
immobilized units may be reassigned to local formations in order to allow a
higher cavalry formation to maintain its mobility.
| Backing Into Trouble |
|
There is a lesser known
aftermath to the story of the first German Tiger Tank to famously knock out one
of the new American Pershing tanks introduced to the fighting near the end of
the war. After knocking out the American tank, the veteran German crew stranded
their own tank on a pile of building rubble that was behind them - they backed
into the debris and could not get the vehicle freed. They were forced to
abandon the precious tank and return to their unit on foot.
Another
inexperienced crew of a brand new Tiger II engaged some Allied tanks from high
ground. The tank was knocked out when its green commander ordered it turned
around and driven directly away from the enemy Allied tanks, thereby presenting
the less armored rear of the tank to direct fire. Direction matters. Facing
matters. Bad things can happen even to veteran units using great
equipment. |
« 3.3 Vehicle
Movement
Vehicles may only move forward or backward (they may not
move sideways), driving forward is considered normal movement and represent the
default movement direction for speeds provided in the Vehicle and Equipment
Values pages. They may change facing at no movement cost in order to change
their direction of travel. Vehicles must move a minimum of 100 yards in order
to be considered to have moved. Vehicles which move less than 100 yards in a
turn are considered to be tactically stationary, and may be fired upon as if
they were stationary. Vehicles may also move backward at a reduced speed, with
some chance of being immobilized (due to running into ditches, becoming
stranded on obstacles, etc.). Vehicles may also drive using an assault movement
speed bonus over open ground, also with some chance of being immobilized for
the same reasons.
Dangerous Terrain - The Wheel and Track
column in the movement section of the combat chart indicates dangerous terrain
or movement types which may cause immobilization. This is indicated by an
i and a die roll range shown on the line for the corresponding
terrain type. A vehicle must roll two six-sided dice (2D6) for each turn that
it moves into or within one or more of the listed dangerous terrain types. A
result within the range shown causes immediate immobilization. Vehicles passing
through more than one dangerous terrain type must roll for each one as it is
encountered.
« 3.4 Transport and
Towing
Transporting Infantry - Infantry stands may be carried
inside vehicles so designated in the vehicle charts. Infantry bases pay half of
their movement for the turn to mount/dismount a vehicle. The vehicle also pays
half of its turn's movement for the unit to mount/dismount. Infantry stands
share the fate of their transporting vehicle; if the vehicle is
damaged/destroyed, all stands being carried by the vehicle are
damaged/destroyed.
Example: A truck which can carry two infantry bases
is damaged. Both infantry bases will also be damaged, resulting in one being
lost as Killed upon dismounting.
Infantry as Riders - Each tank class vehicle listed
as large target may transport one stand of infantry on its hull so long as the
vehicle does not move into a building or water obstacle, or into woods not
along a road. Russian T-34 tanks and related vehicles may also carry infantry
in the same fashion. The cost for infantry to ride a vehicle is 100 yards of
normal movement allowance to mount/dismount, and 200 yards of the vehicle's
movement allowance for the turn.
As noted above, infantry share the
fate of the vehicle on which they ride. If a tank carrying riders suffers
immobilization as a result of combat, the riding infantry is attacked on the
Area Weapons Chart and, if they survive, they immediately dismount next to the
tank without cost to movement. Russian infantry may become riders in any game
set in 1942 or later; all other nationalities may become riders in scenarios
set in or later than 1943. Riders and passengers in half-tracks (only) may fire
from the vehicle by using the moving modifier on the Small Arms Chart
(exception: MG/mortar stands may never fire while being transported).
Towing weapons - Weapon sections which require towing
(see Formation and Equipment) need jeeps, trucks, tractors or prime movers for
their mobility. Those vehicles capable of towing weapons will have that fact
noted in the transport vehicle lists along with the largest gun class which
that vehicle is capable of moving.
The limbering and set up time for each
gun class is shown below. Limbering and unlimbering costs the towing vehicle a
certain portion of its movement. Once unlimbered, a transport vehicle may then
depart (if under fire it will want to do so quickly) and leave the gunners to
set up their pieces. Weapons may not fire on any turn in which they expend all
of their time limbered or being set up. If half or three quarters of a turn is
spent setting up, a weapon will suffer the Moved modifier. If less than a half
turn is expending in unlimbering and set up, the weapon does not suffer the
Moved fire modifier.
| Weapon Size/Gun Class |
Limber - Unlimber Cost
(in turns of
movement) |
Set-up Time
(in turns of
movement) |
Small
1 through
4 |
¼ - none |
none |
Medium
5 or 6 |
½ - ¼ |
¾ |
Large
7 or
larger |
1 - ½ |
1 |
For Example: A Russian 76mm anti-tank gun (gun class
5) is towed into position by its truck, which moved half of its available
movement before stopping to unlimber. It takes one-quarter of a turn to
unlimber, so the Russian gun crew may begin setup, which takes three-quarters
of a turn. They will spend the last quarter of this turn setting up, and since
they will complete their set up in the middle of the following turn, they will
be able to fire, but with the appropriate Moved modifier. If the truck had
remained stationary (i.e. - not moved at all), the Russian crew could have
unlimbered and set up all in one turn, still preventing them from firing that
turn, but allowing them to fire at full effect the following turn.
A towing vehicle may move at only three quarters of its
original maximum movement rate and will have all terrain movement penalties
doubled. No gun type may fire while limbered, the only exception to this being
the German 88 flak gun which may fire while limbered (if stationary) with the
Moved fire modifier.
« 3.5 Defenses
Digging-in - Infantry units and heavy weapon bases which do not require
towing may expend their movement allowance to prepare their own fieldworks
(defenses). Units preparing defenses count as having moved and take six turns
to complete a hasty dig-in or 12 turns to complete foxholes. An engineer base
may dig-in infantry, heavy weapons sections or towed heavy equipment in half
the time listed above (three and six turns respectively for hasty dig-in or
foxholes.
The digging in of tanks and vehicles must be done using
available Setup Sheet defenses at double normal usage. For example: A vehicle
with a 40 yard frontage would consume 80 yards of trench-line in order to be
considered entrenched.
Minefields- Minefields are shown on the battlefield
using empty square bases that have generic/open terrain on them. They are
placed before game play (see Game Setup) and remain in position throughout the
game unless cleared. All minefield bases are considered to contain a
mixed-attack deployment containing both anti-personnel and anti-tank mines.
There are two ways that a minefield base can cause damage:
a) Approach within 60 yards of the edge of any
minefield base. Entering this "danger zone" forces a base to roll on the area
weapons table, with the danger zone counting as a blind barrage modifier. No
other modifiers are applied. The moving player may not pre-measure to make sure
they remain slightly more than 60 yards away from the minefield base edge, they
must visually estimate and stop the combat base at its closest point of
approach to the minefield base so the other player (the minefield owner) can
measure the gap.
b) Pass directly over any portion of the minefield base
itself. For each base which passes through any portion of each minefield base
during its movement, roll for loss or damage on the same Area Weapons Chart as
artillery barrages, only applying the Minefield modifier and no others. If the
base in question was already going to move directly over any part of the
minefield base, there is no need to roll for the danger zone just noted in
section "a".
Minefield Results - If a base receives a Pinned
result, it remains pinned down in the minefield until next turn. On its next
movement, it will have to roll again on the minefield table. If it survives, it
may move away.
An engineer base may clear a minefield base by moving onto
it and rolling on the Engineering Actions table to clear mines. The engineer
bases conducting mine clearing may do so while prone or standing.
« FIRING
4.1 Small Arms Fire
Infantry - Each personnel unit
fires as a whole and may execute one fire die roll per fire sequence. Hence,
the larger a unit, the more inefficient its fire effect. An infantry unit may
fire at full strength if more than two-thirds of its bases have line of sight
to any part of the target. Unit bases which do not have line of sight to the
target may not fire. This would mean that a six base unit with one masked base
would fire full effect, but with two bases masked would fire as two-thirds of a
unit. The masked bases may not fire at another target (units may not split
their fire, sorry there is a reason for that). Line of sight in all these cases
may be maintained through other bases in the same unit, but not through bases
of other units or through blocking terrain.
Other - Each machine
gun base also fires as a unit, and may execute one fire die-roll on the
Small Arms Fire chart when firing at personnel targets. Vehicle mounted
machine guns also roll on the same small arms fire chart. Cavalry bases may
fire small arms while mounted, but they must use the assault weapon range (even
if they do not have assault weapons) with the Moved modifier applied.
Small Arms Ranges - See the Base
and Range Chart for a master list of all weapon ranges.
«
4.2 Direct Artillery Fire
Towed cannons,
vehicle-mounted cannons and mortars may only conduct direct fire combat. Direct
fire means the firing base must have a direct line of sight to its target's
position. This on-board artillery fire is conducted using the Direct
Artillery Fire chart. Each such artillery base may fire once each turn
unless otherwise stated, simultaneously rolling two hit dice and one
kill die (hit and kill dice should be two different colors). Modify the
hit result using the corresponding To Hit modifiers, and adjust the kill
result using the To Kill modifiers.
If the target is a tank type
base, use the Anti-Tank modifiers for firing. If the target is a
personnel type unit, use the Anti-Personnel modifiers. The To Hit
die result box shows whether the modified die roll achieves a hit or a miss.
The To Kill die result box is split into four categories; Infantry,
MG/Mortar, Vehicle and AA Auto. The first three categories are target types,
the last AA Auto category is firing base type. Note that this may result in a
cross categorizing of a base as the direct firing sequence is carried out; a
target may be considered a "tank" during the die rolls and then considered a
"vehicle" for the To Kill result. See below for detailed descriptions of each
kill type.
For hit results, a K hit is a kill which
results in the base being removed from the game. A D hit is a
damage hit, mark the base (or one base in the unit) as damaged. An
I hit is an immobilization hit, which renders a vehicle unable to
move. A None hit result means no effect.
Infantry - The infantry target
type covers foot troops, cavalry and other related
bases.
MG/Mortar - The machine gun/mortar type covers
man portable heavy weapon bases including machine guns, light and medium
mortars, anti-tank rifles and other related base types (a flamethrower base is
an infantry base).
Vehicle - The vehicle target type
covers tanks, tracked carriers, halftracks, trucks, cars, armored cars, portees
and towed artillery. Heavy mortars also count as vehicles if they are
wheeled/towed.
AA Auto - The AA Auto type is not
a target type, it covers bases firing fully automatic cannons greater
than heavy machine gun class (typically anything greater than 0.50cal or 12.7mm
HMG). Each gun barrel rolls one kill die on the firing roll and the results
represent either hits to personnel base types or tank base types. Note that the
To Kill modifiers as applied to this column are designed to be most dangerous
to personnel bases when the cannon fire is from light guns and more dangerous
to tank bases when the auto-cannon fire is from relatively heavier guns. Most
auto-cannon will tend to be anti-aircraft (AA) guns temporarily firing on
ground targets (see direct fire special rules).
Direct
Artillery Ranges - See the Vehicles and Equipment Values pages for
artillery ranges of specific equipment types.
« 4.3 Hit Results
Each
Kill result (K) will destroy the target base, or one base of a targeted
unit. A Damage result (D) will damage the target base, or one base of a
targeted unit. If the damaged base belongs to a personnel (infantry) unit which
already has one damaged base, combine the two damage hits into one Kill and
remove one base of the target unit. Infantry units can never have more
than one damaged base each. Damaged vehicle bases retain their
mobility, but their fire ability is impaired. Immobilized results ( I )
only happen to vehicles (include towed artillery). Vehicles immobilized due to
direct fire are immobilized for the remainder of the game, even through combat
lulls. It is an unrecoverable condition as far as game play is concerned. An
immobilized vehicle base must roll for morale reaction during the Casualty
Morale Test phase. Machine gun and mortar bases are killed when hit. Each
machine gun base may be resurrected once by immediately removing
the closest infantry base from the same battalion and using that base to
reconstitute the machine gun section.
Removing killed bases - In
the case of small arms fire losses, the bases removed should be those closest
to the firing unit. The exception to this is for units suffering the effect of
a packed target bonus. In these cases, the "packed" bases (those within the 10
yard close-range of each other) which are closest to the enemy should be
removed first. This is an important distinction because it can result in the
thinning of a unit and resulting loss of enemy fire effect even during the
course of a fire phase.
« 4.4 Line of
Fire
Infantry units may not fire through the bases of other
sub-units, but they may fire through their own (i.e. - units may fire to full
effect while two or more stands deep). Machine guns may fire through units
belonging to their own battalion only if the battalion has great or outstanding
training. A mortar section may only fire onto an enemy base which can be
directly observed either by the mortar section itself or by a friendly base
which is within 120 yards and line-of-sight of the mortar. Towed artillery and
vehicle mounted cannon may not direct fire through personnel bases which are
erect (e.g. - not prone or rushing).
All units may fire up to a total of 60 yards through full
cover (i.e. - woods, buildings, scrub, etc.) if the target unit is spotted.
Units in cover are spotted if they: a) Have fired or moved while in cover, or
b) Are within 120 yards of an enemy reconnaissance unit, or 60 yards of any
other enemy unit. All units which are in the open, firing or moving, are always
considered spotted and may be fired upon by any enemy unit with a direct line
of sight to the them.
- Fields of Fire - Units and bases have the
following arcs of fire available to them:
- 360 degrees: Infantry, machine guns, mortars,
flamethrowers, anti-tank rifles, main tank turrets.
- 180 degrees: Field guns, pillboxes, secondary tank
turrets.
- 90 degrees: Tank destroyer main armament (cannon), other
hull mounted tank cannon, self-propelled artillery, tank machine guns, bunker
positions.
- All fields of fire are measured off the appropriate front
or side edge of a base or model. In cases of some tanks with multiple secondary
turrets, this may force measurement based at a 45 degree angle to the tank's
centerline (British A9, Russian T-35, etc.).
Prone Units - Units and bases which are prone cannot
fire if they are occupying trenches, pillboxes or bunkers. Units moving through
trenches are assumed to be crouching and so they also may not be fired upon.
Once halted, they must declare either prone or standing status. If prone, they
in turn cannot be fired upon by small arms fire.
« 4.5 Small Arms Fire
Modifiers
The Small Arms Fire Chart is used for infantry and machine
gun fire against personnel targets. It is also used by infantry bases
attempting to assault armor. All chart modifiers are cumulative, and are
defined as follows:
- Hmg - Firing base is using a belt-fed heavy
machine gun of .50 caliber/12mm size.
- Lmg - Firing base is using a clip-fed light
machine gun of .30 caliber or less.
- At prone - Half or more of bases in the target
unit are prone.
- At packed target - The unit being fired upon has
any bases which are within 10 yards of each other at the time the die is
rolled. All packed bases in question must lie within the line of fire of
the firing unit. Groups of horses for dismounted cavalry are also considered to
be packed targets.
- At rushing - Half or more of bases in the target
unit used the rushing mode of movement during their last move
phase.
- Pinned - The firing unit is currently pinned.
- At soft, solid or hard cover - Half or more of the
target is in corresponding cover type. Each tank chassis gives solid cover to
any one personnel base behind it, and field gun shields offer solid cover
protection to their gunners (e.g. - guns with shields count as solid cover
personnel targets). Note the cumulative effect of cover; a shielded field gun
which has been entrenched receives a solid cover bonus for having a gun shield,
and also a hard cover bonus for being entrenched. As noted below, gun shields
do not count as cover against direct artillery fire.
- Weak or Remnant unit firing - If not all bases in
a unit are able to fire because they are masked (blocked) or killed, the unit
must suffer one of the following modifiers: A unit with two thirds or less of
its bases available fires as a weak unit and suffers a minus two to its die
roll. A unit with one third or less of its bases available fires as a remnant
unit and suffers a minus four to its die roll.
- +/- Weapon differential - For Infantry attacks on
tank targets. Add or subtract difference between anti-tank value of infantry
(See organization lists) and defense value of target.
- Moving-Firing Personnel - The firing unit moved or
will move during the current turn. Note that if the defending player fires his
units without adding this modifier, those units may not move during their
pending movement step.
- 400 to 1000 Yard Range - The closest point of the
target being fired upon is 400 to 1000 yards distant from the closest point of
the firing unit. Note that in the combat chart these ranges are quoted in
inches according to the game scale for the respective chart.
- Demoralized - The firing unit is demoralized.
« 4.6 Direct Artillery Fire
Modifiers
These modifiers apply to the Direct Artillery Fire Chart,
which covers the firing of tank guns, towed cannon and mortars. It also applies
to heavy machine guns which fire upon lightly armored vehicles. Use the
anti-tank section when firing at a tank class target and the antipersonnel
section when firing at a personnel class target. Note that you
may fire H.E. in an anti-tank role but that you
must use H.E. in an antipersonnel role.
Hit Die Modifiers
- Large target - Target is a large category
tank
- Joint fire - A unit able to conduct joint fire
(see troop reaction profiles) is able to use their radios to coordinate fire.
Add a plus one to the To Hit die roll. Applies to fire onto different targets
by each base in the unit, or fire onto the same target.
- Outstanding/Poor Firing - Firing base has
Outstanding or Poor training, or has weapon elements to it (optics, fire
control, etc.) that are outstanding or poor. The outstanding fire modifier is a
+1 to the hit die roll, the poor modifier subtracts a -1 from the hit die roll.
Note that these modifiers can be cumulative; a tank with Outstanding training
and a Hit Mod of Poor will experience no hit die modification for these
modifiers (they cancel each other). If a tank has Outstanding training and an
Outstanding Hit Mod, it will receive a +2 on the hit die roll.
- At stationary in open - Target base is not moving
or behind any sort of cover. Sitting duck.
- At packed Infantry - An infantry unit being fired
upon has any bases which are within 10 yards of each other at the time the
die is rolled. All "packed" bases in question must lie within the line of
fire of the firing unit. Groups of horses for dismounted cavalry are also
considered to be packed targets.
- At solid or hard cover - Target base is in cover.
Note that open cover do not protect against mortars (see terrain section). Gun
shields on field guns do not count as cover against direct artillery fire.
- Over 1000 yard range - Closest point of target
unit is 1000 to 2000 yards from the closest point of the firing unit. Note that
in the combat chart these ranges are quoted in inches according to the game
scale for the respective chart.
- Small target - Target base is classed as
small.
- Moving target - Target unit moved five or more
inches during its last move phase.
- Moved - Firing unit has moved during the last
movement phase.
- Damaged - Firing base is damaged.
- Under 200 yards range- Closest point of target
unit is within 200 yards of closest point of firing unit. Note that in the
combat chart this range is quoted in inches according to the game scale for the
respective chart.
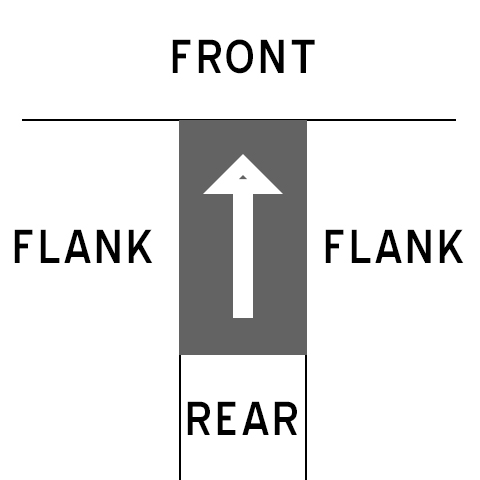
Kill Die Modifiers
- APCP Under 600 yards - Firing unit is using capped
armor piercing rounds at less than 600 yards range. Available according to
equipment chart, firing unit may run out each time it is used. Note that in the
combat chart this range is quoted in inches according to the game scale for the
respective chart.
- Range Under 400 yards - For direct artillery
weapons with a value of one or greater (1+), closest point of target unit is
within 400 yards of closest point of firing unit. Machine guns (zero rated
small arms) do not receive this bonus. Note that in the combat chart this range
is quoted in inches according to the game scale for the respective chart.
- At thin rear - Target base which is fired at in
rear sector (see figure at right) is flagged in the vehicle values lists as
having thin rear protection (Xr value under "Armor Class").
- At flank or rear - Any part of firing unit is
within the flank or rear sectors of the target base. See figure at right.
- Over 1000 yard range - Closest part of target unit
is within 1000 yards of firing unit. Note that in the combat chart this range
is quoted in inches according to the game scale for the respective chart.
- Firing H.E. - Lowers kill effectiveness when high
explosives (from mortars or field guns for example) are fired at a tank
target.
- Weapons differential - Add or subtract the
difference between the value of the weapon being fired and its targets's
defense value.
- Shell size: - Modifies the To Kill die roll
for antipersonnel fire according to the shell size being fired. See the
Equipment & Vehicles listings for references to individual weapons.
- Medium MG - Firing base is a medium machine gun
attempting to fire in an anti-tank role. Subtracts two points from Kill
roll.
- Heavy MG - Firing base is a heavy machine gun
attempting to fire in an anti-tank role. Subtracts one point from Kill
roll.
« 4.7 Direct Fire Special
Rules
Machine Guns - Machine gun bases may not fire on the
same turn that they have moved. They may not fire upon enemy machine guns if
enemy infantry/cavalry targets are closer.
Heavy and medium machine
guns may fire on tank targets including armored cars, half-tracks, etc. at a
zero (0) AP rating (see Vehicles & Equipment listings for machine gun
details). When doing so they are subject to most standard modifiers shown on
the Direct Artillery Anti-Tank section except the following: The Under 400
yards modifier which applies only to direct fire artillery weapons with a
value of one or greater, and the Firing HE modifier which never applied to
machine guns. Machine guns must use the Weapon Differential modifier, which
will often render them ineffective. Light machine guns may not fire in any
anti-tank capacity.
Mortars - Medium and light mortar bases assigned as
heavy weapons may not fire on the same turn they have moved. When firing, they
use the Direct Artillery Fire Chart, and may only use HE and light smoke
ammunition types, with light smoke counting as secondary ammunition. See the
Vehicles & Equipment pages and the combat chart's Ranges
table for more information about specific mortar attack and range values.
Secondary Ammunition - Many vehicle and equipment
types use weapons which can fire more than one type of ammunition. In such
cases, there is always a primary ammunition type which is considered to
be available in an inexhaustible supply, and a secondary ammunition type, which
is considered to be available in a limited supply. Any ammunition type listed
first in an armored vehicle's Ammo column (see the Vehicles &
Equipment lists) is assumed to be available in unlimited quantities.
Ammunition types listed after that are considered to be secondary
ammunition and are subject to exhaustion without warning. If an unmodified
1 is rolled on the To Kill die while firing any of these
secondary ammunition types, the firing base is considered to have run out of
that particular ammunition. Bases with depleted secondary ammunition should be
marked to show their inability to fire any more of that ammunition type for the
duration of the game.
Passing Fire - This occurs when a unit fires at enemy
units that are moving. Units which pass fire must be marked and may not fire
during their next fire phase. Target vehicles must move more than 120 yards in
order to be eligible as a passing fire target. Enemy infantry may be pass fired
upon if they move more than 20 yards in view of an enemy unit (e.g. - infantry
crawling along the bottom of a trench may not be fired upon, etc.).
Rapid Fire Reward - Any weapon which rolls a natural
12 (boxcars) on the hit dice for the direct artillery chart is immediately
allowed to fire a second time. It may fire at the same base as before or select
any other valid target.
Flamethrowers - Units equipped with flamethrowers may
fire on and destroy any one enemy base each turn. This occurs regardless of the
target's protection and does count as a fire attack. This means that a
qualified base must fire either its small arms or flamethrowers, but not
both. A flamethrower must roll 1D6 whenever used, if a 1 or 2 is
rolled, that base has run out of fuel for the rest of the game or until a lull
allows it to refill and re-activate. Flamethrowers are considered to be assault
weapons, and share all standard assault weapon features and abilities.
Smoke - Smoke capable units which have not previously
fired during the turn may support friendly units with smoke cover by announcing
the firing of smoke at the start of their movement step. Smoke prevents passing
fire on units within or behind the smoke screen. The smoke screen does not last
beyond the movement phase, and covers a 30 yard diameter for each shell size
point of the weapon itself (i.e. - a five rating covers a 150 yard
diameter, etc.). All mortar sections may use smoke, as can vehicles with an
S weapon code. All bases firing smoke (including mortars) are
subject to the secondary ammunition rule.
Pillboxes & Bunkers - A pillbox base gives hard
cover to two machine gun bases or one infantry base. A bunker gives hard cover
to three machine guns, two infantry bases or one towed cannon base not larger
that a 57mm gun. Large bunkers which hold more than this should be covered in
special scenarios.
AA Ground Fire - If AA weapons want to fire on ground
targets, they must pass a Command die roll on the AA Engage column (shared with
the Assault Movement command column). If the attempt occurs within one turn of
any airstrikes (friendly or enemy) taking place on the battlefield, the Busy
AA modifier applies. If the AA base was attacked directly by aircraft this
turn it may not fire on ground targets at all. Against personnel targets, AA
machine guns will roll one small arms fire die per gun barrel, with all dice
firing on the same target. For AA auto-cannons (weapons heavier than HMGs) use
the direct fire artillery table, see direct fire instructions above.
« MORALE
5.1 Testing Morale
There are two times during the turn when
a unit may have to test for morale: First; during the Casualty Morale
Test phase, before assaults are resolved, all units which have had any
bases killed or damaged during the current turn must conduct a morale check.
Second; after assaults are resolved, any unit which has become
demoralized because of losing an assault, will also check morale. This can
result in a unit testing morale twice during the assault phase.
To test
a unit's morale, roll one six sided die (1D6) and modify the result using the
Morale Roll Modifiers. Cross reference that final value with the appropriate
troop grade for the unit in question to arrive at the effect. Note that no unit
which rolls a modified 3 or more will fail their morale test. Depending on the
troop grade, an adverse effect may occur on a modified 1 through -2. There are
six possible effects, with some results combining several of these effects.
Units suffering more than one effect will distribute the effects as evenly as
possible among the affected bases. For example: A fanatic unit which rolls a
modified -2 would have a "C B S" effect. This means that one-third of the
remaining bases will charge, one-third will break-up, and one-third will
surrender. If the unit has so few bases left that it prevents dividing the
results evenly, apply the effects in order, from left to right. In this case,
if the fanatic unit only had two bases remaining, one would charge, the other
would break-up (remove from play).
« 5.2 Morale Roll
Modifiers
- Hard cover or better - Half or more of the unit's
bases are in hard cover
- Scenario Defender - Unit belongs to the player
considered to be the scenario's defender.
- Weak unit - Unit has lost at least one-third (1/3)
of its original bases.
- Damaged tank unit/base - The tank base (for
bailout rolls) or unit (for standard unit tests) is damaged. In the case of a
tank unit, all bases must be damaged in order for the unit to count as
"damaged"
- Unsupported - No friendly infantry units or tank
bases are within 240 yards. Note that in the combat chart this range is quoted
in inches according to the game scale for the respective chart.
- Demoralized - Unit is already demoralized at the
time of the die roll (before the die is rolled).
- Remnant unit - Unit has lost at least two-thirds
(2/3) of its original bases.
- Attacked by tank or flamethrower - Unit is being
assaulted by one or more tank bases, or has been fired upon by a
flamethrower.
« 5.3 Morale Failure
Effects
Pinned - Infantry units with half or more of their
bases either in the open or open topped cover (walls, berms, etc.) will go
prone and remain stationary through their next movement phase. Units in all
round cover (woods, buildings etc.) are not affected. Any personnel class
vehicles operating with the pinned unit will withdraw. Mounted cavalry which
receive a pinned result will also withdraw. Tank class vehicle bases or units
which receive a pinned result will halt at their current location for one
turn.
Withdraw - Infantry units move one normal move
directly away from enemy, facing the enemy. Units unable to comply due to
obstacle restrictions (rivers, cliffs, ocean, etc.) will move directly away
from the enemy as far as possible while staying under cover (if available) and
assume a Pinned stance. For example, a unit forced to withdraw back past a
seawall and onto a beach will seek cover behind the wall rather than stand
around in the surf! Units which cannot withdraw without passing through enemy
bases will surrender. Vehicle bases or units must withdraw a minimum of
one-half of available normal move unless immobilized, in which case they will
be abandoned (mark base as abandoned). Withdrawing vehicle bases may withdraw
either facing the enemy or turning around and driving directly away from the
enemy.
Rout - Infantry units will conduct one assault move
directly away from the enemy, facing in their direction of movement. Assume a
pinned stance at completion of the rout move. Other rules applying to blocked
movement for withdrawing units also applies to routing units. Vehicle units
will move their full available movement away from the enemy unless damaged or
immobilized, in which case they will be abandoned (crew bailout reaction) and
removed from play.
Surrender - Infantry unit surrender to nearest enemy.
If friendly troops are present between the unit and the enemy, the
"surrendering" unit will break-up instead.
Charge - True to the tradition of the inspired
fanatic (or at least their commanders), the only solution to the current
problem is a good old-fashioned bayonet charge. All affected units and base
types assault the nearest enemy unit, regardless of the unit type being
assaulted.
Break-up - All affected bases are removed from
play.
« 5.4 Demoralization
A
unit automatically becomes demoralized when it routs or loses an assault. A
demoralized unit suffers substantial minuses when rolling to move, fire,
assault or check morale. It will lose its demoralized status if the controlling
player rolls a morale test for the unit on any turn following the one on
which it became demoralized. A morale result of pinned or better will rid the
unit of its demoralized status, although it must still obey a pinned result if
that occurs. A morale result of withdraw or worse (rout, break-up, surrender)
will result in the unit keeping its demoralized status, as well as causing it
to suffer the additional results of the morale test. The morale testing of a
demoralized unit is optional. A player may choose to allow a unit to be
demoralized through the remainder of a game rather than risk the results of a
risky morale test.
Example: A unit becomes demoralized due to being
voluntarily routed during the Attacker Move phase. It may not
attempt to recover during the next casualty morale phase, because that is in
the same turn as the occurrence of demoralization. The unit must wait until the
casualty morale phase of the following turn. If it then rolls an R B result,
half of the unit will rout, and half of the unit will break-up (be removed from
play). The surviving routed half retains its demoralized status and may not
attempt to roll again for demoralization recovery until the next turn's
casualty morale phase.
« 5.5 Special Rules
Voluntary rout - Units may be extricated from assaults by being
voluntarily routed. To conduct a voluntary rout, the player must roll a morale
test for the unit. If it passes, then the unit may immediately rout one full
assault move to the rear, becoming demoralized in the process. If the unit
fails the test, then it will suffer whatever results are called for on the
morale chart. This may result in the surrender or disintegration of the unit.
Voluntary routs are conducted either during the movement or assault phases.
Units which are pinned and units which initiate assaults may not voluntarily
rout.
Local Heavy Weapons - Heavy weapon bases which are within
the deployment zone of a unit which has failed a morale test will also be
affected by the same die roll. Machine guns are assumed to be one morale grade
higher than the adjoining troops and react accordingly. Other supporting heavy
weapon bases are considered to be the same morale grade as the adjoining troops
and react in conjunction with them.
« ASSAULT
6.1 When to Assault
An assault occurs when personnel units
begin an assault phase in base to base contact with enemy units. Once contacted
during either of the movement phases, opposing personnel units (both attacking
and defending) are locked in place. Unless one side successfully orders a
voluntary rout, neither participant may break contact until the assault is
resolved.
Defending personnel units involved in an assault may still
employ small arms fire during their respective fire phase. Normally equipped
assaulting personnel units may not fire during their fire phase, although
nearby units and heavy weapons from the attacking side may fire at the
defending units if they are not in direct contact with enemies and do not
violate line-of-sight rules.
Assaulting units or bases which are equipped
with assault weapons may fire during their respective fire phase, as may any
units whose original strength was three bases or less. They will however still
suffer a fire modifier for having moved, as well as all other applicable small
arms modifiers. This assault-fire ability does not extend to normally equipped
"host" personnel bases or units which have assault weapon bases attached to
them. Such personnel units are still not allowed to fire while assaulting. See
the Introduction section for assault weapon
definitions. Tank bases (both assaulting and defending) may also fire during
their respective fire phase, resulting in their being able to fire machine guns
twice during a turn.
« 6.2 Personnel vs
Personnel
To conduct an assault which involves only personnel type
bases, each side in the assault (not each unit) rolls 1D6, with the loser
losing the difference in bases. This is done for three rounds or until one
group is eliminated, after which the overall loser of the assault (the side to
lose the most number of bases) becomes demoralized and must check morale.
Overall ties lose an additional stand each and are pinned for one turn. If a
side wins all three assault rounds and eliminates all assault
opposition, they breakthrough and may occupy any uncontested positions within
one assault movement.
Heroic fight - In some cases the only surviving side
of an assault may also be the side which lost the most number of bases. In this
instance, the surviving unit becomes pinned for one turn.
- Cavalry - Assaults involving mounted cavalry units
have their number of die roll rounds reduced from three to one or two. Involved
units must still take morale checks as required by the turn sequence, and are
subject to other fire restrictions and modifiers. Cavalry units may not assault
tanks or armored cars, nor may they assault troops in buildings, bunkers,
pillboxes, trenches or other enclosed cover.
- Cavalry vs Infantry: Assaults involving
mounted cavalry versus other non-mounted personnel units only have two die roll
rounds, with the cavalry receiving a +1 to each of their assault die rolls. If
the cavalry wins the assault, they have the option of either dismounting in
place or using their remaining movement to reposition
themselves.
Cavalry vs Cavalry: Assaults involving only
mounted cavalry units versus other mounted cavalry units will only have one die
roll round. The results are then calculated after the single round and the
loser reacts accordingly.
« 6.3 Tank vs Personnel
To conduct an assault round involving tanks versus infantry, each side rolls on
the Small Arms Fire chart. Each tank base in a participating tank unit may use
each of its machine guns to "assault fire" on any of the enemy infantry units
involved in the assault. Each involved infantry unit opposing the tanks will
compare their anti-tank assault value to the armor value of the target
tank(s) and use that difference (called the weapon differential) to modify
their small arms roll against the tanks. This may result in more than one tank
base being killed by one infantry unit. If opposing more than one tank unit, an
infantry unit must choose one of the enemy tank units for assault. Units
without an AT assault value are not capable of assaulting tanks.
Assaulted heavy weapons (mortars, machine guns and towed cannons) do not
participate in assault rounds. If unsuccessful in destroying or immobilizing
the assaulting vehicles during the movement or fire phases, they are simply
overrun and removed from play unless they are accompanied by friendly infantry
which is able to destroy or chase away all enemy tanks. Bunkers and pillboxes
are not units but they do prevent units occupying them from being assaulted by
tanks, which cannot assault bunkers, pillboxes or other tanks.
Armored Overrun - Tank units may resolve assaults
against personnel type units during their own movement phase. It costs each
participating tank one-quarter of its movement per three-round assault
conducted. So long as their morale remains sound, tank units may conduct any
combination of movement and assaults until their movement allowance is
expended. Also, tanks may continue their move after an assault round even if
their enemy is not destroyed or broken. They may simply drive through and keep
going.
« 6.4 Mixed Units
Mixed
assaults, involving infantry, towed cannon and tanks on both sides should be
resolved keeping in mind the following allowances:
- Involved infantry units may only engage one unit type
opposing them in an assault . They may not for example, split off bases in
order to engage a separate tank base if they are already engaging infantry
units.
- Involved tank bases must either use machine gun fire on
opposing infantry or fire normally at opposing tanks, not both.
- Tanks do not assault other tanks.
- Involved towed cannon, machine guns and mortars will fire
normally during the fire phase and then suffer the fate of whatever unit they
are with. If they are not accompanied by an infantry unit and fail to kill all
attacking bases, they are overrun and destroyed.
« 6.5 Assault
Modifiers
The following die roll modifiers apply to units involved in
assaults;
- Pinned or worse - Half or more of involved bases
for that side are from units which are currently suffering from negative morale
results of pinned or worse (withdrawn, routed, etc.).
- Hit in rear - Front edges of enemy bases are in
assault contact with the rear edges of units whose bases make up a majority of
defending bases. Limbered artillery bases are always considered to be hit in
rear.
- Unit hit on two or more sides - Half or more of
total bases involved for that side belong to units which are in assault contact
on any two of their four sides.
- Example 1: The defender has a unit
which has enemy bases striking its front and left flank. The defender suffers a
minus one on each die roll because of this.
- Example 2: A defending unit of four
bases has enemy bases in contact with its front and left flank, and a friendly
unit of six bases has joined the assault. If the unit joining the assault is
only engaged on one side, the defender does not receive a minus on the assault
rolls because a majority of involved bases are engaged on only one side.
- Prone - Half or more of involved bases for that
side are prone.
- In solid cover or better - Half or more of
involved bases are in solid or hard cover.
- Outstanding training - Half or more of involved
bases belong to units with outstanding training.
- Great/Poor training - Half or more of involved
bases belong to units with great or poor training.
- Cavalry - Half or more of involved bases are
mounted cavalry engaging personnel targets. Does not apply if the personnel
targets in question are armed with flamethrowers, or are inside of bunkers,
pillboxes, buildings, trenches or other full cover.
« ARTILLERY FIRE SUPPORT
Barrages used in 1943 represent off-the-board artillery firing for effect into
player declared impact zones. Fire support requests for barrages are requested
during the Barrages phase, and after a period of waiting (see Turn Sequence)
they become available for board placement. The quantity and type of fire
support missions available to each side are decided using the Setup page. This
is similar to how airstrikes work, except that fire support points are
reusable.
Resolve Barrages - The first step in each barrage phase
is to resolve all current barrage markers for both sides which were placed on
the board during the previous turn. Any units which moved into or out of a
barrage's effective radius should have already rolled during their movement
phase (Going prone does not count as a move). In those cases, they do not need
to roll again. Barrages are shown on the playing board using the barrage
markers discussed previously. The markers were placed during the Place Barrage
Markers step of the previous turn's Barrages phase and affect all bases
within an 80 yard impact zone radius which are fully or partly within the zone
(all mid-game barrages are medium, only planned barrages executed before the
game starts are heavy).
Artillery Spotting - Barrage markers
located at points which are under direct friendly observation are considered to
be spotted barrages. Barrage markers located at points which are not
under direct friendly observation are considered to be blind barrages,
which suffer a minus on the area weapons table. Base types that may spot for
barrages include infantry unit bases, command bases (including command tanks),
reconnaissance unit bases, heavy and medium artillery bases (size 7 or larger)
and dedicated spotter bases. Other base types such as heavy weapons, tank
combat bases, truck transport and anti-tank guns may not spot for barrages.
« 7.1 Area Weapons
The
Area Weapons table is used to resolve hits for barrages, airstrikes,
minefield and other weapons with area effects. Roll 1D6 and modify its result
using the applicable modifiers list. Modifiers are cumulative unless otherwise
stated. A "K" hit results in a base kill for that base, remove it from play. A
"D" hit results in a damage hit, mark the base as damaged. For personnel unit
bases, a "P" hit will cause the base and its parent unit to become Pinned
through the following turn for artillery, or for the current turn if caused by
airstrikes or minefields. Once all barrages have been rolled for, remove all of
the markers to the discard pile.
Area Weapon Modifier
Descriptions:
- At Prone - Subtract one point (-1) from the die
roll if the target base is prone and/or currently in a hastily dug-in
position.
- At Solid/Hard Cover - Subtract one point (-1) from
the die roll if the target base is in solid or hard cover. Bases within wooded
areas do not benefit from this modifier, even if the woods normally offer cover
benefits against direct or small arms fire.
- Blind Barrage - Subtract one point (-1) from the
die roll if the target base is within a blind barrage zone (not spotted/under
observation).
- Personnel Target - Add one point (+1) to the die
roll if the target base is a personnel class target (e.g., infantry, heavy
weapon, truck, etc.)
- Minefield - Add one point (+1) to the die roll if
the base is rolling for having entered a minefield.
- Dive Bomb - Add one point (+1) to the die roll if
the base is under attack by a dive bomber airstrike (limited to one target base
per airstrike marker base).
- Rocket/AT Cannon (Air) - Add two points (+2) to
the die roll if the base is within the strike zone of a Rocket or AT Cannon
airstrike.
Open Requests - After all artillery barrages on the
board have been resolved and removed, players then roll to activate any stacks
of barrages queued from previous turn's requests (referred to as Open Barrage
Requests). Roll for each stack (in case there are more than one), and if the
player rolls equal to or less than the activation number displayed on the die
stacked on top of the barrage tokens, they may place those barrages on the game
board, keeping in mind whether they will be blind or spotted
barrages. Players may only roll once each turn to attempt to activate each
request stack. This means they might possibly have several request stacks
queued up, waiting for their "number" to be rolled.
Fire Support
Requests - After resolution of all artillery barrages and processing of
open barrage requests (if any), players may roll for a new fire support
request, if able. This is carried out similar to airstrike requests; if there
are available points based on the player's Fire Support Pool total, they may
request fire support. Roll 2D6, one black and one white. The black die result
is the maximum number of barrages that can be pulled from the fire support pool
(one fire support point equals one barrage). The white die result sets the
activation number for this barrage stack (even a "stack" of one). Set a small
die on the airstrike base with the activation number turned-up. This is how you
found the barrage stack and activation die waiting for you at the start of the
turn - they were placed there last turn (or before game play started).
The player does not have to use the full quantity of points rolled on
the black die. The black die result is merely the maximum number of barrages
the player can pull this turn to go into this group (fire support pool points
permitting). The current fire support pool points are a strictly finite set
that cannot be exceeded. If there are only three points available, then only
the first three points rolled on the black die mean anything. However, an
important difference is that artillery fire support is a permanent presence in
the area near your troops, so they are a resource that is utilized on a
rotation. This means that the fire support pool number is a limit on the total
number of barrages that can be in circulation, either on the board waiting to
inflict casualties as active barrages (fire support missions) or as queued-up
in request stacks, waiting to actually carry out their mission. As barrage
markers are pulled into service, the fire support pool number does not get
marked down like the air presence number does.
Example #1: A player with two fire support points
in the pool rolls a 1 on the black die. The player may only pull one barrage
marker and roll the activation number for it. Do not modify the fire support
pool total.
Example #2: A player with 12 fire support points in their
pool has five barrages deployed onto the game board, and two more barrages
waiting in a fire support request stack with a "2" value activation die on top
of that stack. This means he has seven points usable out of their 12 available
fire support points in the pool. If they roll a 5 on the black die, and they
roll a 5 on the white die, it is a good time to pile on the artillery barrages
because five is a good activation value. The player then pulls five barrage
markers, places a small 1D6 on top with the "5" facing up, and sets it next to
the other fire request stack. The player now has all twelve of his fire support
points in-play. At the start of the next turn's barrage phase, the five
barrages on the board will be removed and those five points will be "released"
to be requested again - request die roll's
permitting.
Counterbattery Fire - If a player has counterbattery tech that is capable to spotting enemy off-board artillery, and they have newly activated barrage markers just placed or about to be placed, a player may declare at the time of an enemy barrage's placement that they are attempting to locate that battery (abstractly, we are referring to each barrage token as coming from a single battery). They roll 2D6 and will "spot" the battery on the following rolls: Advanced spots on a 6+, Capable spots on a 9+, Primitive spots on a 12. The counterbattery player may then declare one of their newly activated markers for counterbattery fire and redirect it to counterbattery fire duty.
If the counterbattery firing player has already placed their barrage(s), they can pull one of them back from the board for the counterbattery mission. Either way, the assigned marker is set aside, either next to a command base or in an open area of the rear lines (recommend setting a post-it note under it with "Counterbattery" printed on it to avoid confusion with other markers). On the next turn's resolve of active barrages, the player will roll that marker on the area weapons table as a blind barrage. Any D or K hits will reduce the enemy Fire Support Pool total by one point.
« 7.4 Special
Rules
Visibility and Smoke Effects - Units inside of a barrage
are partially obscured by dust and debris. As a result, these areas count as
solid cover against direct fire. Units firing from inside of a barrage also
suffer the same minus for having to fire through the barrage effects. See the
1943 Rule Lookup Sheet for an expanded outline of spotting guidance and
effects.
A player may use up a barrage as a smoke screen. A barrage
smoke screen is the same size as a normal barrage of that type (spotted or
blind respectively) and will last for the rest of the turn. No direct fire may
be conducted through the smoke screen, which is assumed to be three levels
high.
Terrain effects - Each barrage roll of a natural
1 will destroy one each of the closest sections of buildings and
woods, if any, within 100 yards of the base being shelled. A 60 yard diameter
cratered zone is created at the point that each terrain segment is lost due to
barrage fire.
Each barrage roll of a natural 6 will
destroy one each of the closest segments of trenches and wire entanglements, if
any, within 100 yards of the targeted base. A 60 yard diameter cratered zone is
created at the point that each wire segment is lost due to barrage
fire.
Combat damaged terrain should be modified only after all barrage
die rolls are completed. The terrain modification should occur in areas where
a) combat bases were just lost due to barrage die rolls, or b) where there are
currently no combat bases present, or c) at last resort, where combat bases are
present. In the last case, the combat bases present may immediately be moved up
to 60 yards in the direction of the nearest cover.
|
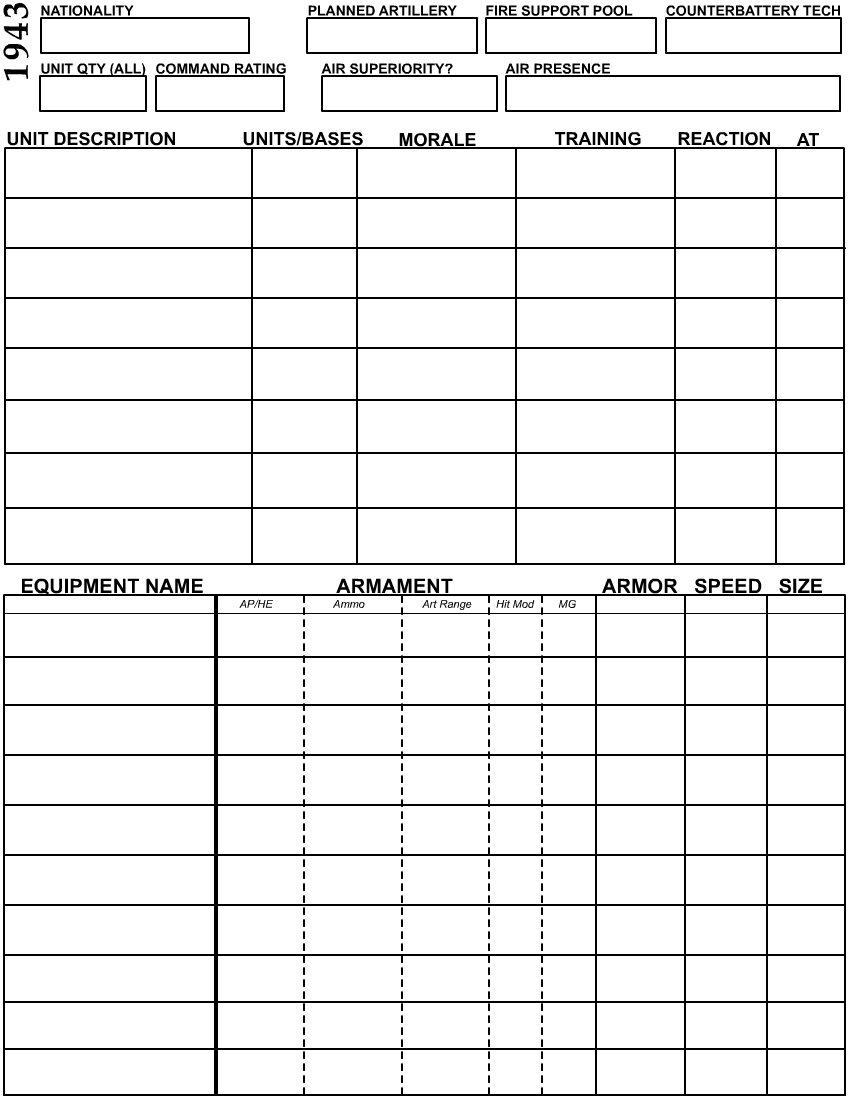